Sunday 15 June 2014

Gfive President G9 Quad Core

Description:

G'Five present a new Android Smartphone GFive President G9. This phone has 5.7 inches large IPS Capacitive touchscreen where you can watch HD videos, play games and do you work with smooth touchscreen. The  8 MP camera with Flash LED  its improves the quality of picture because this camera has an autofocus function which can focus on something and give you the best quality picture. This mobile has Quad-core 1.2 GHz processor with 1 GB RAM  which improves the performance of mobile to use it fast. With connectivity option Wi-Fi help you to browse fast internet with Pakistani networks. This has pre-installed apps like Facebook, Viber, Whatsapp and you can download and install millions of apps through Google Play store.

Specifications

Specification
Full NameGfive President G9
ManufacturerGFive
Phone TypeTouch Screen
AnnouncedJune, 2013
ReleasedJune, 2013
StatusAvailable
ColoursWhite,Black
Dual SIMYes
Camera
Camera8 MP
Video recordingYes
FunctionsFlash LED, autofocus
FeaturesGeo-tagging
Front CameraYes
Power Management
Stand by timeUp to 500 h
Talk TimeUp to 5 h
Display
ScreenIPS HD Capacitive touchscreen
Resolution5.7 Inches
Connectivity
BluetoothYes
Wi-FiYes
GPRSYes
GPSYes
USBmicroUSB (v 2.0)
2G NetworkGSM 850 / 900 / 1800 / 1900 SIM1 & SIM2
3G NetworkSupports
Memory
Memory Card TypemicroSD
Extensible MemorySupports upto 32 GB
Call LogYes
Software
Operating SystemAndroid
OS Versionv 4.2 (Jelly Bean) And Up-gradable to 4.4 (Kitkat)
Internet BrowserHTML5
Hardware
RAM1 GB
ROM4 GB
CPUQuad-core 1.2 GHz MT6589
SensorsAccelerometer, proximity
Entertainment
RadioYes
Video PlayerYes
Alert Type / Ring TonesVibration; MP3, WAV ringtones
Messaging
  • SMS
  • MMS
  • IM
  • E-Mail
Applications
  • G-Cloud
  • Gmail
  • Youtube
  • Google Maps
What's in the box
  • Handset
  • Battery
  • Charger
  • Headset
  • User Manual
  • USB Charger
Images:


Wednesday 4 June 2014

Game Killer 2.60 Full (Root)

** ROOT ONLY **
This tool only works in rooted devices!!
Main Features:
1. Search game value with precise number.
2. Search game value with vague instructions, e.g. larger or smaller.......


3. Lock the game value to a fixed number.
4. Save/Load the managed list....

5. Touch GameKiller sprite to bring up the tool during gaming.
6. HEX edit
7. Dump code
8. More. 
Requirements: Android 1.5+
Overview: A powerful Game cheat tool!

V2.61 update:
1. new data filtering (data type, data range, address range);
2. the largest list of items to 500;
3. Fixed some bugs.


Enjoy!


Friday 30 May 2014

[FIX] [SOLVED!] Play Store No Connection Error Fix!

**ROOT IS REQUIRED!**

Here is a short fix for the No Connection Error on play store. It may not work on all devices.

1. Download Total Commander from Play Store or HERE.
2. Install it in your Device.
3. Open Total Commander and goto Root of System. (/ )
4. Open the etc folder.
5. Find the file named "hosts", and hold it for 3 seconds. Choose edit file, and choose Total Commander Text Editor if prompted.
6. Delete everything and paste this at the first line: " 127.0.0.1 localhost". Copy it exactly, dont modify anything.
7. Save the file and overwrite if needed.

Downloads:
Total Commander (Root file explorer I am using): Here

Once again feel free to contact me if you have any questions or if I am doing anything wrong.

Please leave a "Thanks!" if it helped!

Sunday 25 May 2014

Light Flow - LED&Notifications v3.15.109 APK


Description
Light Flow allows you to take control of your notification LED colors and makes them successively flash one color after another.
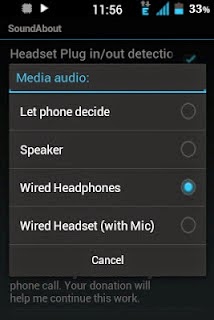
It also allows you to set repeating sounds on vibration patterns for you notifications. You can also set a "sleep" mode or "on charge" where the lights and/or sounds and vibrations will not be heard or seen. If you've come from a Blackberry device and miss the features of BeBuzz / BerryBuzz then give LightFlow a try!
This program will allow you to control the notification color for the over 600 applications and system events such as:
* Missed calls
* Voice mail
* Calendar reminders
* gmail
* email
* SMS messages
* MMS messages
* Low battery
* No signal
* Google talk
* Facebook
* Twitter
...and many many more
See our website for a full list of applications supported:
http://www.folioflow.com/ff/page/website/lightflow/pageId/1687

It allows the colors to flash in succession, so if you have a new SMS and a missed call it can alternate between the two colors. You can also set which notification type has the highest priority and let it flash in just that one color.
It'll even push notifications out to your pebble smart watch, Sony smart Watch and the DashClock lock screen extension.

For a full changelog see here: For a full changelog see here:
https://www.folioflow.com/ff/page/website/lightflow/pageId/1693
For a full list of permissions required and why see here:
http://www.folioflow.com/ff/page/website/lightflow/pageId/2277
Known issues/Limitations
-------------------------
Samsung phones when accessibility is enabled may cause the phone to start talking, warnings about air view and a few other issues. These are confirmed samsung bugs (see here: http://developer.samsung.com/forum/board/thread/view.do?boardName=GeneralB&messageId=204387) but the app can be run without the accessibility service and still work (but with a reduced notification list)

Not all phones support all colors.
For example: Most HTC phones only support 3 colors and require "Rooting" and running the app in "direct mode"
Some phones can only light up the notification while the screen is off.
Some phones cannot have their notification light always on
Some phones cannot have their notification blink and it will always be on
Note that it will take over control of your notifications and you will therefore only get notifications for categories that the app allows.

? We recommend you try the "lite" version first before purchasing to avoid any disappointment if it doesn't work for you. Some phones require root privileges to access the LEDs. ?
? For the differences between this version and the lite version see here: http://www.folioflow.com/ff/page/website/lightflow/pageId/1687 ?
? If after updating you have problems we recommend you reboot your phone ?
** Most HTC phones require "direct mode" setting. Most gingerbread builds for HTC phones require root access due to HTC changing the permissions on the LED control files. **
** If upgrading from the "lite" version, please uninstall the lite version first but you can backup and restore settings between versions **
===================================


Enjoy!

Saturday 17 May 2014

How to make CWM with a rooted MTK MediaTek phone

HEY GUYS TODAY I AM HERE TO TEACH YOU HOW TO CREAT YOUR CWM RECOVERY WITH THE HELP OF MTKDROID TOOLS....

MAKE SURE  YOUR DEVICE IS COMPLETLY ROOTED.....

PROCEEDING NOW!!!

REQUIRED:
1.MTK droid tool installed in your pc.
2.detacable
3.a rooted phone

NOW CONNECT YOUR PHONE WITH DATA CABLE TO PC AND MAKE SURE  THE USB DUBBING SHOULD BE ON....

WHEN THE DEVICE IS CONNECTED INSTALL ITS DESIRE DRIVERS IF IT SAYS TO INSTALL OTHER WISE IF IT NOT SAY IT MEANS YOUR DRIVERS ARE PRE INTALLED IN PC.....

NOW OPEN MTK droid tool.


When MTK DROID TOOLS LOAD YOUR DEVICE INFO, CLICK ROOT_BACKUP_RECOVERY OPTION,SEE THE IMAGE ABOVE.....

CLICK ON RECOVERY AND BOOT AFTER THIS

AND YOU HAVE DONE!shortly after a dialogue box will appear asking if you want to 'make cwm recovery automatically' click yes....


The tool will then create the recovery and another dialogue box will appear asking to 'install created recovery to phone', click yes.


And finally the tool will ask to reboot into recovery mode, click yes and the device will reboot into CWM recovery so you can check the installation was successful.

Thursday 15 May 2014

No-frills CPU Control


Description
***********************************
This app requires ROOT permissions.
If you don't know what root permissions are, you probably don't need this app.
***********************************
No-frills CPU Control is a tool you can use on your rooted [1] device to quickly set the CPU frequencies and governor to use.
It allows you to use the highest frequency your phone supports and gain some precious FPS in your preferred game, or go down to the lowest frequency and gain some more juice when your phone is sitting idle.
All of this without any memory footprint or services running in the background!
It has been reported working on a large number of rooted [1] devices from HTC, Samsung, Motorola, LG, Huawei, ZTE, Oppo and so on! Even Kindle and Nook Color!
Unfortunately, it does NOT work on Flytouch tablets, Zenithink zt180, HaiPad M7/Tabtech M7 or fake HTC/Samsung clones. Sorry about that, but you knew what you were buying when you did... didn't you?
Is your device supported? You need ROOT permissions and you'll probably need to be running a CUSTOM ROM (an example is the famous CyanogenMod) with kernel frequency scaling enabled. If you are unsure... just install the app and see for yourself!
If you need a custom ROM for your phone, the best places to find one are XDA [http://forum.xda-developers.com], MoDaCo [http://android.modaco.com/] or similar forums.
Be wary of the frequencies you select! Your phone may lock or become unresponsive if it doesn't like extreme values, but -hey- better safe than sorry: even though No-frills CPU Control allows you to choose if you want to apply the settings on boot, it comes with an extra "safety valve" too! If the device doesn't shut down (or reboot) in a clean way, it will not apply the settings, avoiding those nasty boot-loops you may have had with other overclocking apps. Please keep in mind that apps like QuickBoot are as quick as they are unsafe?

Download Here:Link

SCR Screen Recorder Pro Root

Description
Works only on rooted/jailbroken/unlocked devices!
Don't install if your device is not rooted.
Record great quality screencasts directly from your phone or tablet!
SCR Screen Recorder uses hardware accelerated video encoding to achieve best quality screen recording on any device. It's the only video recorder on the market supporting Tegra device including Nexus 7.
This is an early BETA preview version so it may not work on all devices and ROMs. Before you buy consider testing SCR Free to ensure that your device is already supported. If you encounter any issues please report it at scr.screen.recorder@gmail.com to help me get your device supported.

SCR Screen Recorder collects anonymous usage statistics to help track bugs and analyze how users use the app. This software uses unmodified code of FFmpeg 1.2 licensed under the LGPL.

Download Here:Link

LagFix (fstrim) Premium v1.5.1


Description
? THIS APP REQUIRES ROOT! ?
? WARNING! ?
Read FAQ before using! http://forum.xda-developers.com/showpost.php?p=37029420&postcount=122
Try FREE version before you buy! https://play.google.com/store/apps/details?id=com.grilledmonkey.lagfix
Warning! This app should only be used by ADVANCED users! If you do not understand what it does - DO NOT USE IT! You can find fstrim() man in Google and more information on XDA - http://forum.xda-developers.com/showthread.php?t=2104326. RTFM before asking any questions or rating this app bad!
Some Android users suffer from poor performance after some days/weeks of heavy usage. This is due to a well-known TRIM bug affecting these devices (users report Nexus devices, Samsung Galaxy S3 and HTC One X devices are affected). Kernels with -discard mount option are NOT affected!
The source of the problem is that internal storage is not properly TRIMmed when needed. You can find lots of information on XDA - http://forum.xda-developers.com/showthread.php?t=1971852 and http://forum.xda-developers.com/showthread.php?t=1929021 It is also well-known fact that running fstrim Linux tool from time to time fixes the issue until internal memory runs out of free blocks. Other solutions like mounting with -discard or disabling fsync may be slow or dangerous.
LagFix is a user-friendly implementation of fstrim utility. It allows you to select which partitions to trim (you should leave defaults unless you know what you are doing) and run the process easily. Scheduled auto-trim is also available.
Please note that fstrim output depends on kernel and device. It works fine unless you see errors. You might see big amounts of bytes, zero amount or repeating amount. All are fine! Read fstrim manual to understand why all these outputs are valid.

Download it: Link 

Sunday 11 May 2014

Download Our Android Application and Keep Up to Date.

Now Keep Up to Date More with Our Website in just one touch. We Developed a Application for you:
Download it from Here: 
http://goo.gl/zXvDoU

Wednesday 7 May 2014

How to Restore ROM using CWM recovery

TODAY I WILL SHOW YOU HOW TO RESTORE THE BACKUP MADE WITH CWM RECOVERY IN OUR PREVIOUS POST......

SO LETS START!

1.BOOT INTO CWM RECOVERY MANUALLY OR WITH ANY TOOL LIKE MOBILE UNCLE TOOL.

2.AFTER ENTRING USE VOLUME UP OR DOWN KEY FOR NAVIGATION AND POWER KEY FOR SELECTION.

3.GOTO 'BACKUP AND RESTORE' OPTION(YOU WILL SEE LIST OF BACKUPS YOU MADE EARLIER.

4.CHOOSE THE BACKUP FILE FROM THE LIST.

5.THE LAST CHOOSE THE OPTION RESTORE AND CLICK YES TO CONFIRM YOUR CHOICE WITH THE HELP OF VOLUME AND POWER KEY.


THATS DONE ENJOY!

How to Backup Stock/Custom rom using CWM recovery

HI GUYS TODAY I WILL BE TELLING YOU HOW TO MAKE BACKUP OF STOCK ROM OR CUSTOM ROM FROM YOUR CWM RECOVERY>>>>>>

SO FIRST......


1.BOOT INTO THE CWM RECOVERY MANUALY OR BY MOBILE UNCLE TOOL FROM GOOGLE PLAY STORE.

2.IN RECOVERY MODE, USE VOLUME UP AND DOWN KEY FOR NAVIGATION AND POWER BUTTON FOR SELECTION.

3.GO TO 'BACKUP AND RESTORE' OPTION USING VOLUME KEYS.


4.NOW, SELECT BACKUP OPTION USING POWER KEY.

Note: You may get less options than you?re seeing in this image. It may be because of modified version of CWM recovery. So no need to bother about that.

The Process will start and backup will be completed within a few minutes. It will be saved in a folder named ?Clockworkmod/backup? on your device?s internal or external storage depending on what location you choose while creating the backup (never rename this folder) MIND IT....

Thats IT Enjoy!

Tutorial Backup ROM with MTKDroidTools.

HI GUYS TODAY I WILL GUIDE YOU HOW TO BACKUP WHOLE ROM DUMP WITH MTK DROID TOOL!!!

SO FIRST......

DOWNLOAD ADB DRIVERS FOR YOUR DESIRE DEVICE FROM GOOGLE
DOWNLOAD MTK DROID TOOL HERE

INSTALL THESE DRIVERS IN YOUR PC OKZZZZZ.......

NOW THE TOTORIAL:

1.Device have been rooted by above step

2.Set Device to USB Debugging Enable

3.Go to MTK Droid Tools > Run As Administrator MTK Droid Tools.exe

4.Connect Phone to PC via USB Port


  • Green color on device indicator 9300 indicate the devices have been ROOTED (The Color for every computer probably different)


  • Click Second Tab : root, backup,recovery


  • To do Back up Just Click Back Up Button, by default MTK Droid Tools will back up the whole rom WITHOUT USERDATA

    (everything user setup like google account, email setting, time zone, gmail setting).
      If you want to back up also your peronal setting then Thick Backup User data and Cache, otherwise let it blank

  • Option Leave Flash Tools File on SD Card will also store backup file to phone's sd card  Suggestion Leave it Blank,
     since storing the file at sdcard probably will fail if sdcard full

5.Once everything satisfying : Click BACK UP Button


- Back up process starting


  • It is take a while Just be patient

  • Upon nearly finishing Back Up a pop up request appear

  • Suggested to click YES, by accepting the option, Tools will archive the whole back up rom into zip file.
  It is easier to be store and upload to internet storage

6.FINISHED ?. Back Up file stored into.......
(MTKDroidTools installed location > then named Backup Folder)


Here take a look!!!


How To Root Qmobile Noir Series,Voice Xtreme Phones.

HI GUYS I WILL BE TELLING YOU TODAY IS HOW TO ROOT QMOBILE NOIR SERIES AND VOICE XTREAM AND GFIVE PHONES EASILY AND SAFELY.......

LETS BEGINS!

1.FIRST DOWNLOAD A APPLICATION CALLED AS FRAME ROOT FROM HERE IN YOUR PC OR LAPTOP.

2.THEN CONNECT YOUR DEVICE WITH THE DATACABLE TO PC OR LAPTOP AND THE MESSAGE WILL APPAIR IN YOUR PHONE (TOUCH TO TURN ON USB STORAGE).

3.WHEN THE PHONE INTERNAL AND EXTERNAL SHOWS UP IN YOUR PC OPEN YOUR SD CARD DRIVE FROM PC AND PUT THE ABOVE APPLICATION IN IT.

4.THE PC WORK IS DONE! DISCONNECT YOUR DEVICE AND IN YOUR PHONE GO TO SD CARD AND FIND THE APPLICATION YOU PUT IN AND CLICK IT AND INSTALL IT IN YOUR DEVICE.

5.NOW THE PROCESS BEGINS! OPEN THE APPLICATION CHOOSE BETWEEN SUPER USER/SUPERSU.THEN CLICK ARAGORN OR GANDALF.

IT WILL LOOK LIKE THIS


6.AFTER 5TH STEP THIS SCREEN WILL APPARE


 7.AFTER THIS SCREEN YOU HAVE TO REBOOT YOUR DEVICE AND YOU WILL FIND SUPER USER ICON IN YOUR MENU AFTER REBOOT AND YOU HAVE DONE!!!!

NOTE:I AM NOT RESPONSIBLE FOR ANY KIND OF DAMAGE TO YOUR DEVICE MIND IT.

IF YOU FOLLOW CORRECT IT WILL BE ALRIGHT.

FOR CHECKING ROOT ACCESSS DOWNLOAD ROOT CHECKER FROM GOOGLE PLAY!


Root Your Gfive Mobile G9 Eassily And Safely Without Computer.

HI GUYS TODAY I WILL HELP YOU TO HOW TO ROOT YOUR GFIVE G9 IN EASY AND SAFE METHOD!

SO LETS PROCEED.......

1.FIRST DOWNLOAD A APPLICATION CALLED AS FRAME ROOT FROM HERE IN YOUR PC OR LAPTOP.

2.THEN CONNECT YOUR GFIVE G9 WITH THE DATACABLE TO PC OR LAPTOP AND THE MESSAGE WILL APPAIR IN YOUR PHONE (TOUCH TO TURN ON USB STORAGE).

3.WHEN THE PHONE INTERNAL AND EXTERNAL SHOWS UP IN YOUR PC OPEN YOUR SD CARD DRIVE FROM PC AND PUT THE ABOVE APPLICATION IN IT.

4.THE PC WORK IS DONE! DISCONNECT YOUR DEVICE AND IN YOUR PHONE GO TO SD CARD AND FIND THE APPLICATION YOU PUT IN AND CLICK IT AND INSTALL IT IN YOUR DEVICE.

5.NOW THE PROCESS BEGINS! OPEN THE APPLICATION CHOOSE BETWEEN SUPER USER/SUPERSU.THEN CLICK ARAGORN OR GANDALF.

IT WILL LOOK LIKE THIS


6.AFTER 5TH STEP THIS SCREEN WILL APPARE


7. AFTER THIS SCREEN YOU HAVE TO REBOOT YOUR DEVICE AND YOU WILL FIND SUPER USER ICON IN YOUR MENU AFTER REBOOT AND YOU HAVE DONE!!!!

NOTE:I AM NOT RESPONSIBLE FOR ANY KIND OF DAMAGE TO YOUR DEVICE MIND IT.
IF YOU FOLLOW CORRECT IT WILL BE ALRIGHT BECAUSE I HAVE TESTED ON G9 AND SUCCESSFUL.

FOR CHECKING ROOT ACCESSS DOWNLOAD ROOT CHECKER FROM GOOGLE PLAY!

Saturday 3 May 2014

SetCPU | Control Android CPU Speed Automatically


 Most of you know that after rooting your Android phone CPU speed can be increased. The process of increasing CPU speed is called 'overclocking'. Most of you are familiar with the word. Overclocking surely increase speed of Android. But overclocking has many disadvantages. It consumes more battery, heat up the battery, decrease phone's life.
What about automatically adjusting CPU speed. Increase CPU speed when it is necessary (like playing games) and decrease CPU speed when heavy loads is not necessary (when screen is off, when you sleep). So SetCPU is here to help you.


WHAT IS SETCPU AND HOW TO USE SETCPU


SetCPU is a app (requires root) which can increase or decrease CPU speed according to your wish. You can define many conditions/ profiles to controls the CPU speed. For example when the screen is off the CPU speed will be decreased. When screen is off CPU speed decreases. When battery is low CPU speed decreases. You can set such many profiles and condition and priority.  (app, day, time, battery temperature and many more). By doing this your battery life will be much much better, because one of the main reason for battery life in Android is due to high CPU usage.

Download and install SetCPU. Create profiles as your wish. For example create two profile screen off and on. In screen off set cpu minimum. Thus CPU will be less used. Look at the screenshots for more profiles


Fix Headset Problem after Installing JellyBlast ROM


HOW TO  FIX HEADSET PROBLEM AFTER INSTALLING JELLYBLAST


SoundAbout is an application is an application that can route the audio to speaker or earphone. JellyBlast cant detect headset. But headset really works. SoundAbout routes sound/ audio to earphone, speaker etc as you wish. Only you need to to select which one you want. Here is the download link and some screenshots on solving headset problem of JellyBlast and SoundAbout

Here DownloadingLINK

Thursday 1 May 2014

How to Increase RAM on Android Phone


One of the important feature we must look before buying an Android Phone is the RAM memory. RAM and processor speed are very important to an Android Phone because it tells the capacity of a phone, latest version it can handle, multitasking, gaming etc. For many low end smart phones they have very less RAM. Nearly 300MB. Android itself takes 50-60% of it. So friends here i am giving you a simple trick to increase ram of your Android Phone. This can be applied to both low and high end devices. Because RAM always makes your Android faster, smoother and powerful.

HOW IT WORKS?

Most of you know RAM is a chip that is inbuilt in motherboard of a phone. There is no way to make changes in the hardware. That means actually you cant increase ram. But what actually a ram do is save and distribute files at high speed. What if you memory card can do it. Memory cards can also save and distribute files. So what we do is create a swap file and store files from ram to the swap file. Thus if ram becomes full, data in ram is transfered to swap file in sd card thus it gives more space on ram. Final output is faster, smoother and powerful Android capable of running multiple apps and hd games at no lag.
WHAT ALL YOU NEED TO INCREASE RAM?

An application called RAM Expander (for creating swap file)
A memory card with minimum speed of 6MB/sec. It is highly recommended that the memory card must be of class 6 or above. Normal memory cards are class 4. Class 6 and above have more speed.

HOW TO INCREASE RAM ON ANDROID PHONE


  • Open RAM Expander, select language
  • From the bottom click 'optimal value'
  • Values will be automatically changed. Don't change the 'swappiness value' value. You can change the swap file size as your wish.Don't make it too small, because it you additional ram memory!
  • Now check on 'swap activ'
  • It will take time.
  • Done


Downloading LinkHere